Do you have a shower head that just won’t stop dripping? If you do, stick around because you are going to fix that leaky part. There are two things that you are usually a little hesitant to take on, and that’s electrical and plumbing. With that said, this is going to be a really simple and easy fix that any of you can do if you know what the problem is.
Why Does My Shower Head Keep Dripping?
You know that constant shower head drip that never stops? That’s usually because something inside your shower just isn’t closing off water completely. A super common culprit is worn-out O-rings or rubber washers sitting in the valve or the handle. In time, those seals get hard, cracked, misshapen, or just lose the snug fit they once had, and water sneaks past even when you turn the handle all the way off.
Another reason is mineral buildup (limescale) or sediment. If your water is hard, bits of calcium, lime, or other gunk can clog up the valve, the cartridge, or the openings inside the shower head, which messes up how everything seals. That can let water bypass the closed parts and drip out anyway. Also, if the valve or cartridge itself is damaged or worn (maybe because of the mineral deposits or just from use), it doesn’t close all the way, so even if the handle is “off”, water is still getting through.
How Do I Stop My Leaky Shower Head? Step By Step
Of course, any shower head is going to drip a little bit right after you take a shower, but when it’s always leaking just a little bit constantly, that tells you something is off
The fact is, there’s water being pumped up to the shower head constantly, just a little bit, but enough to make it drip. That tells you that it’s not the shower head that is necessarily the issue. It can be the handle and the valve in it that turns the water on and off, and it is probably not closing all the way. Maybe there’s a seal or a gasket in there that’s gone bad, that’s allowing just a little bit of water through.
So that’s where you are going to start. You are going to go ahead and take the handle off. You are going to be able to get to that cartridge on the inside, see what the problem is, and then what you are going to end up doing is just replacing the entire cartridge on the inside.
That is where you start. You take the handle off, get to the cartridge inside, and then replace the entire cartridge.
The first thing you want to do is shut off the main water to the house before you start messing with any plumbing.
1. Remove Shower Handle and Outer Plate
On your handle, there should be a small screw hole meant for taking off the outer handle. There will be a screw down in there as well. To take off the outer handle, you are just going to grab your Allen wrench and go ahead and start to loosen that screw.
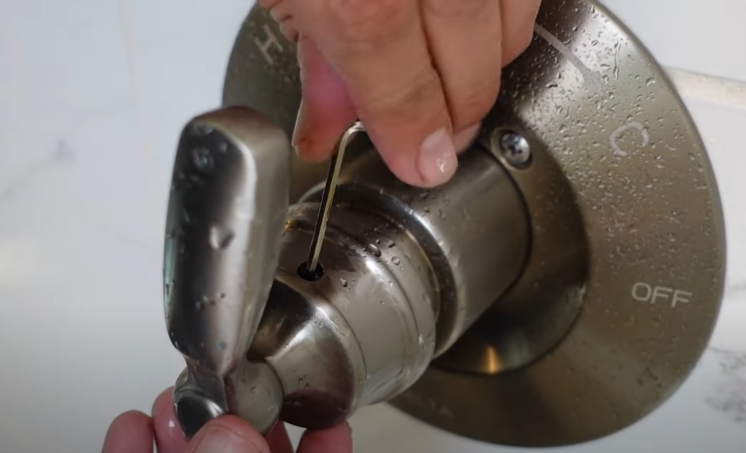
One other thing to mention is that it may be a good idea to cover the drain in your shower with a washcloth or something, just so you don’t have to worry about dropping any screws down in there.
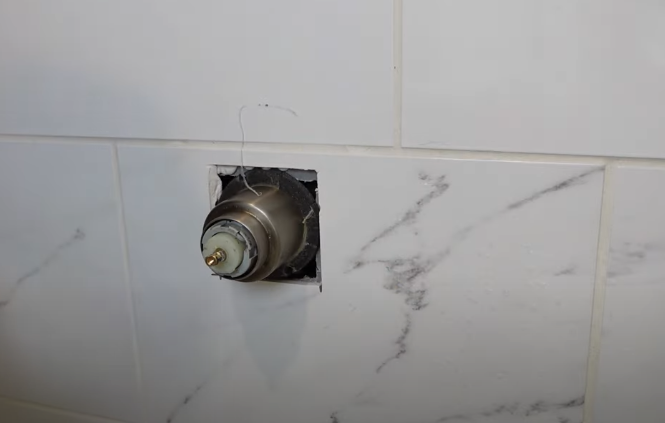
All right, and that’s going to expose your valve and your cartridge.
Now, you will see two Phillips head screws holding the outer plate. Take those off. There may be a little silicone on the top edge, so cut that, and the plate should come right off.
2. Remove Collars
Next, you have this decorative metal collar that you want to take off.
You don’t want to put too much stress on any of these pipes and stuff back here, so anything you do, you are going to want to be very gentle about how you do it. Get in here behind it and just very gently start to pull that off.
Then there is another threaded metal collar. The best way to remove it is with a rubber strap wrench. Wrap it around, tighten it, and gently rotate. Once it loosens, you can take it off by hand.
3. Remove Cartridge
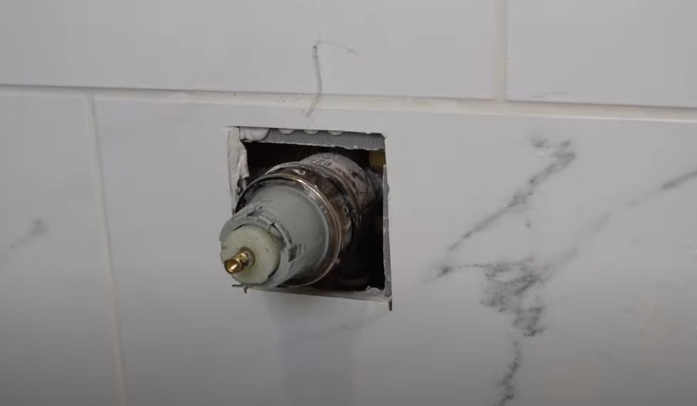
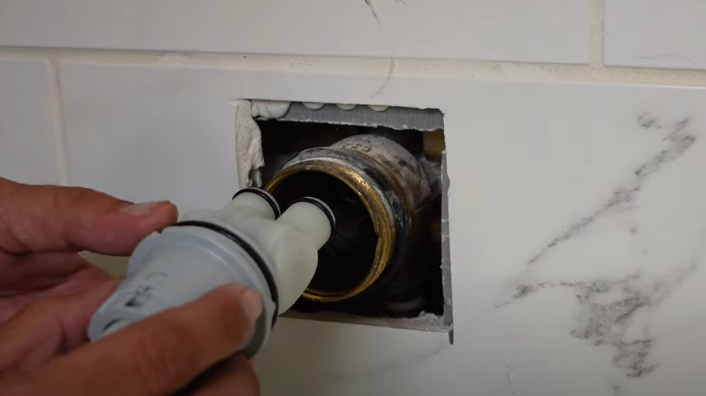
Inside the valve is the cartridge, which is the whole piece that goes inside the main valve. This is likely the part that has gone bad, or one of the rubber seals inside it. The cartridge has a notch in the top that accepts a flathead screwdriver.
Put that in there and just very gently start to work that out.
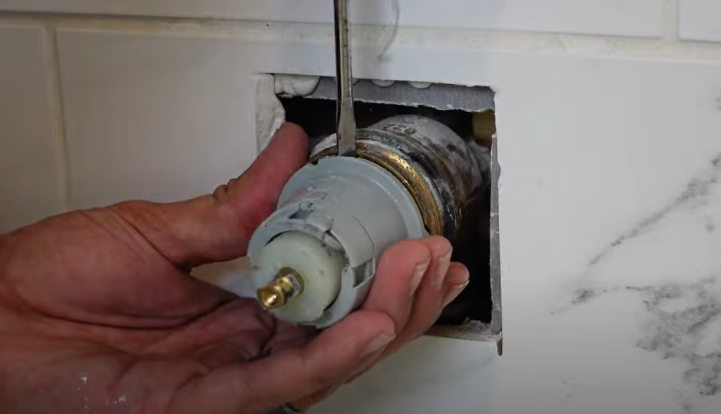
There’s going to be some resistance there, but just very gently start to pull this out. Don’t be worried if you get a little bit of water coming out. There is still going to be some in the pipes.
Pro Tip: Now, when you first pull the old cartridge out, something may fly out of there. You may pick it up and not know what it is at first. If you have a Delta faucet, this is a little sediment filter that is inside the valve when you are first installing and testing it. But after that, before you install your cartridge and your shower knobs, this is supposed to be removed and discarded. Apparently, whoever installed yours did not do that, and this is very likely what was causing the problem. If this were in there, interfering with those seals, this could have been the problem allowing water to get past your little O-rings. So, if you find this in your Delta faucet, remove it.
4. Examine Old Cartridge
Next up, take a look at the old cartridge, which has O-rings—a large one and two smaller ones. Over time, these can go bad and cause the shower head to leak constantly.
If you are looking to save a little money and do this the cheapest way possible, you could just replace these O-rings and see if that fixes your problem. But instead of trial and error, you can just replace the whole cartridge. All you need to do is look up the make and model of your fixtures, and you should be able to find that without much hassle.
5. Put In the New Cartridge
Cartridges usually have markings for hot and cold sides.
When you put the new one in, you want to make sure that you are putting it in the correct orientation. Usually, your hot is on the left, and your cold is on the right. So, align the triangular tabs properly with the notches inside the valve.
Then, tighten the collar by hand, then with the strap wrench, and slide the decorative collar back on.
6. Reassembly & Testing
The last step is to reassemble in the opposite order. Since the outer plate did have silicone around it when you took it off, go back and add some of it just to make sure no water gets in behind there. Then reinstall your handle in the correct orientation.
Now, turn the water back on. The shower head should not leak. Test both hot and cold water. After running the shower, give it a minute, dry everything, and check again.
Conclusion
If there is no dripping coming out of the showerhead, you’ve done the fix. This may not work for everyone, but it should for most older showers where O-rings or cartridges have worn out.
Replacing the cartridge usually fixes the problem. Sometimes, there might be some other issues going on in there that require some help. California Coast Plumbers has experts who are at your beck and call for any problems, like leaky shower heads and other serious catastrophes.