When you’re buying a property, like a house or condo, it’s highly recommended to check it for plumbing issues, even if it might seem in decent condition.
This 17-point inspection list will help guide you through your first visit so that you have less to worry about. Once you’ve checked the items on this list after your visit or inspection, you’ll have something to negotiate for and be better aware of what will need fixing.
1. Check for Clean Outs
A clean-out is a definite check for you. A clean-out is basically a branch on the main sanitary drain with a screw-on cap that allows it to be snaked for any eventual blockages, and it should look like this. If the owner doesn’t mind, it’s a good idea to unscrew the cap and check if the drain is free-flowing by having them flush a toilet once or twice. This gives you a good idea if there are roots in the pipes or any potential blockage.
2. Make Sure the Sinks and Faucets are Well Fastened
You should make sure the sinks are well fastened. It could be that the kitchen or bathroom sinks weren’t secured properly, and water could leak in between and cause water damage. A quick way to check from underneath is to try moving it or propping it up. If it doesn’t move, you’re good to go.
Like the sinks, you can’t ignore faucets. The property you’re inspecting may have a loose bathroom faucet, so always make sure to test it by turning it. If it doesn’t move, it means it was properly installed, and you can move on to the next point.
3. Inspect the Toilet
A wobbly toilet can lead to leaks, sewage odors in the house, and it just doesn’t look good. To test if it’s properly secured, get over it and try rocking it left or right. If it moves a lot, it could be that the bolts aren’t tight enough or that the flange it’s attached to is rotten or broken, so make sure it’s firm and stable.
While at it, you should check the toilet seat and handle. This might sound unnecessary to some, but if they’re both broken, expect to pay around $50 to get them fixed.
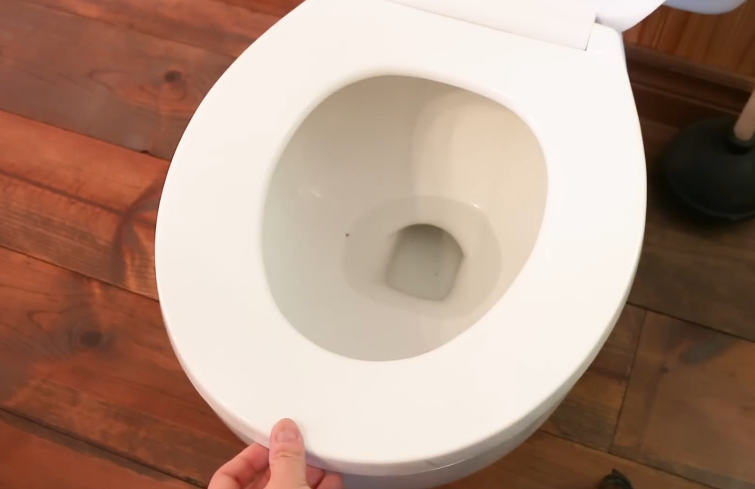
It’s something that many people don’t check when buying a home, so a quick 10-second visual inspection can save you $50, which is about the price of a small grocery trip.
4. Make Sure All Fixtures Have P-Traps
A P-trap is what prevents any sewage gases from entering the home, and if there aren’t any, you’ll most likely smell a weird rotten-egg odor when you enter the room. Every fixture must have a P-trap. The toilet, however, has one built into it, so there’s no need to check that. A shower or bath is easy to check as well—just grab a flashlight and point it at the drain. You should see some water inside.
5. Verify Hot Water Tank Replacement
The hot water tank is generally due for replacement after ten years, depending on the brand and the type of water it handles. Having a new tank installed could cost between $400 and $1,000, so it’s a good idea to know when it’s due. A good way to know is to check the date on the water heater. If it’s close to ten years old, take that into account.
6. Pay Attention to Leaky Faucets
It could be that the shower, lavatory, or any outdoor faucet is leaking.
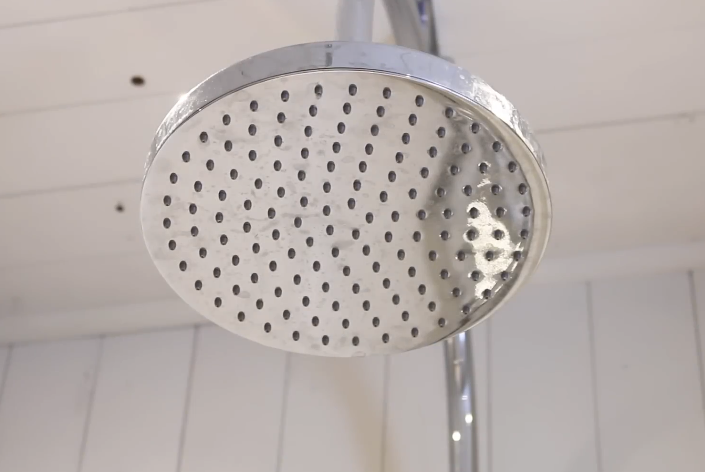
It doesn’t just cost to fix the faucet itself; if you don’t, you’ll end up paying for wasted water, which can add up quickly. So make sure you don’t have any water leaks.
7. Check the Condition of Water Lines
You should check the condition of your water lines. This applies more to homes that have copper pipes, and it’s to check if there’s any blue-greenish crust on the pipes or fittings.
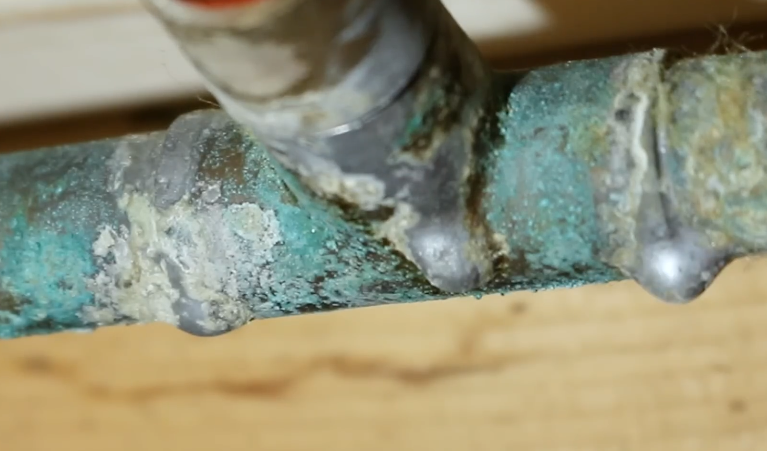
This crust could be due to the plumber not wiping off any excess flux when it was soldered, and since it’s an acid, it eats away at the copper over time. If the pipe was left stagnant for a long period with excess flux inside, it could also cause damage. Some plumbing can stay like this for a long time, but others may develop pinholes that lead to extra costs and expensive water damage. If you see a lot of this during your visit, it should raise a red flag.
8. Keep an Eye Out for Hidden Leaks
It’s possible that the owner of the property doesn’t even know there’s a small leak. A good way to check is to see if the home has a water meter—pay close attention to the small black triangle. If it rotates while all of the fixtures are shut, it means there’s a small leak somewhere.
9. Check for Pressure
A typical home will have around 45 psi of water pressure. Low pressure is not a good sign, and high pressure isn’t any better. Low pressure could mean that you have galvanized piping, which is expensive to replace, and high pressure could be harmful to your fixtures since most of them have a PSI rating of 80 psi. It’s something to be mindful of. You can get a cheap gauge at a hardware store if you want to check it yourself.
10. Check the Supply Hoses
Supply hoses for each fixture are made of rubber and dry out in time. One of the most common causes of internal flooding in homes is a burst flexible water hose, either from a washing machine or a simple fixture. Go around and visually inspect them, and if you see any rusted or twisted lines, it means they need to be replaced.
11. Inspect the Main Water Valve and Line Size
The main water valve should be in good working order. If a burst pipe were to occur and the shut-off valve didn’t work, you wouldn’t be able to stop the water, plain and simple. That’s why it’s very important that it works. To test it, close the valve and open a fixture. If there’s still water coming out after a few minutes, it means it’s not sealing properly and probably needs servicing.
You should make sure the main water line coming into the house is at least three-quarters of an inch in diameter. You want to have a pipe of that size coming into the house to avoid problems such as a lack of water flow when multiple fixtures are being used at the same time.
12. Check for Galvanized or Lead Piping
Both galvanized and lead pipes can be found in older homes, and they must be removed and replaced with new piping as soon as possible. This could bring the cost up to around fifteen thousand dollars if you plan on doing it, which is something you can easily use to negotiate the price. Give Google a quick search to learn how to recognize galvanized piping, and you’ll be all set.
13. Look for Under-Counter Leaks
You should also look for under-counter leaks. A quick way to test for leaks is to fill the sink with water and then drain it. Just running water won’t always reveal a leak, but draining a full sink will.
14. Confirm a Floor Drain in the Basement
Many homes don’t have a floor drain in the basement, but it’s very important. If a major leak occurs, such as a failed hot-water tank, the absence of a floor drain could cause the basement to flood. So, you should confirm it’s there.
15. Ask About Past Drain Blockages
You should ask if there have been any major drain blockages in the past. Just visually inspecting it, as before, isn’t enough to be 100% sure. If tree roots have damaged the pipes, they may need to be excavated, which can cost thousands of dollars. Be aware of this by discussing it with the owner, and if there has been an issue, having the drain inspected with a camera is a good idea before buying.
16. Identify Polybutylene (Poly-B) Piping
Poly-B is a gray plastic pipe used from 1978 to 1995 that was prone to failure and property damage. Replacing it can cost around fifteen thousand dollars. Talk with the owner to make sure there’s no Poly-B piping inside the house.
17. Determine the Sewage System Type
You should also know if the home uses municipal sewers or a septic tank for sewage. If it uses a septic tank, it will need maintenance and eventual replacement, which can easily reach five-figure costs. It’s important to know this before buying.
Conclusion
That completes the list. There are many other things that could be added, but these points already cover the essentials. If you can’t do it all yourself, you can always hire California Coast Plumbers to do an honest review before you invest in a house.